Fast-Track Your Skills: Embroidery Digitizing Shortcuts Experts Use
Introduction
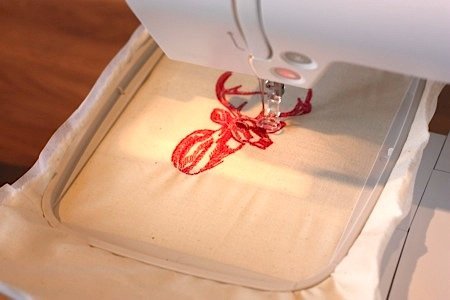
Digitizing embroidery is both an art and a science that transforms digital designs into stitch-perfect reality. While beginners often struggle with clunky workflows and trial-and-error adjustments, seasoned digitizers work with precision and efficiency—completing projects in half the time while maintaining impeccable quality. The difference? They've mastered the hidden shortcuts and strategic approaches that make digitizing embroidery faster and more accurate.
Whether you're converting logos for corporate wear, creating dimensional 3D puff designs, or tackling intricate artwork, these insider techniques will help you work smarter. In this comprehensive guide, we'll reveal:
-
Essential software shortcuts that accelerate your digitizing workflow
-
Pro-level stitch optimization tricks for cleaner, more professional results
-
Common digitizing mistakes that waste time (and how to fix them)
-
Must-have tools that embroidery experts rely on daily
If you're ready to transform your digitizing process and achieve expert-level results faster, let's dive into these game-changing techniques.
1. Software Shortcuts Every Digitizer Should Know
Use Hotkeys Like a Pro
Most digitizing software (Wilcom, Hatch, Pulse) has keyboard shortcuts that save hours over time. For example:
-
Zoom & Pan – Use mouse scroll + Alt or Spacebar to navigate quickly.
-
Undo/Redo – Memorize Ctrl+Z and Ctrl+Y instead of clicking menus.
-
Quick Select Tools – Assign custom hotkeys for frequently used tools.
Master Auto-Digitizing (When Appropriate)
Auto-digitizing isn’t always perfect, but it can be a great starting point for:
-
Simple shapes (circles, rectangles)
-
Basic text (block fonts)
-
Background fills (when manually adjusting later)
Pro Tip: Always refine auto-digitized designs—never rely on them fully.
Save & Reuse Custom Settings
Create presets for:
-
Stitch types (satin, fill, running)
-
Density & Underlay (for different fabrics)
-
Color palettes (brand-specific threads)
This prevents starting from scratch on every new project.
2. Stitch Optimization Tricks for Faster, Cleaner Results
Reduce Stitch Count Without Losing Detail
Too many stitches slow down production and can cause thread breaks. Try these fixes:
-
Increase stitch length slightly (0.4mm → 0.5mm) where possible.
-
Simplify small details – Merge tiny elements into larger shapes.
-
Use fewer color changes – Group similar shades together.
Choose the Right Stitch Type
-
Satin stitches – Best for borders and text (keeps edges crisp).
-
Fill stitches – Ideal for large areas (adjust angle to prevent puckering).
-
Running stitches – Use for fine details (like hair or outlines).
Optimize Underlay for Stability
A good underlay prevents fabric distortion. Use:
-
Zigzag underlay for stretchy fabrics.
-
Edge run underlay before satin stitches.
-
Center walk underlay for large fill areas.
3. Common Digitizing Mistakes (And How to Fix Them)
Mistake #1: Ignoring Fabric Type
-
Solution: Adjust density & underlay based on material:
-
Thick fabrics (denim, canvas) – Higher density.
-
Thin fabrics (silk, polyester) – Lower density to avoid warping.
-
Mistake #2: Overcomplicating Small Details
-
Solution: Simplify tiny elements—they’ll get lost in stitching anyway.
Mistake #3: Poor Pathing (Causing Jump Stitches & Thread Breaks)
-
Solution:
-
Stitch from center outward to reduce pull.
-
Minimize jumps by grouping colors logically.
-
4. Time-Saving Tools & Resources
Top Digitizing Software for Efficiency
-
Wilcom EmbroideryStudio – Industry standard for precision.
-
Hatch by Wilcom – Great for beginners & mid-level digitizers.
-
Pulse IDS – Advanced auto-digitizing with manual control.
Must-Have Plugins & Add-Ons
-
StitchArtist (for CorelDraw users).
-
Ink/Stitch (free open-source option).
Cheat Sheets & Templates
-
Download pre-set stitch angle guides.
-
Keep a fabric density reference chart handy.
Conclusion
Digitizing embroidery designs doesn’t have to be a slow, tedious process. By using hotkeys, optimizing stitches, avoiding common mistakes, and leveraging the right tools, you can cut your digitizing time in half while improving quality.
Key Takeaways:
✔ Master software shortcuts to navigate faster.
✔ Optimize stitch types & underlay for cleaner results.
✔ Avoid over-digitizing—simplify where possible.
✔ Use presets & templates to skip repetitive setup.
With these expert shortcuts, you’ll spend less time fighting your software and more time creating stunning embroidery. Now, go put these tricks to the test!
What's Your Reaction?